Give a young child a blank piece of thick paper and three simple pots of paint: red, yellow, and blue. Within ten short minutes, that pristine white paper will not just display three neat patches; it will become a chaotic, beautifully messy swirl of orange, green, and purple. Children are born as natural, fearless scientists, and their very first messy chemistry experiment almost always happens at a wooden art easel.
When they accidentally smear a wet yellow brush into a blue pot, they often gasp in genuine, wide-eyed shock as a completely new shade magically appears before their eyes. This joyful, unexpected accident is the absolute perfect doorway into understanding early colour theory.
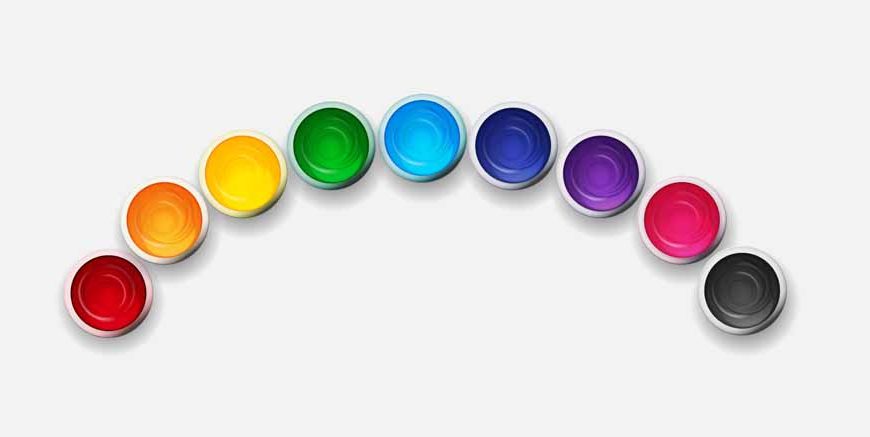
Teaching children about the colour wheel does not require boring, complex lectures; it requires messy hands, a little bit of guided patience, and a whole lot of fun. Let us explore exactly how to actively introduce this vibrant concept, moving far beyond the basics to discover the absolute magic of mixing.
A Simple secondary colours definition
Before we excitedly start mixing wet paints on the kitchen table, we need a clear, easy way to logically explain what is actually happening. A perfect secondary colours definition is incredibly straightforward: they are the brand new, exciting shades created when you mix two equal parts of basic, primary shades together.
Think of the primary shades as the strong parents. They are completely original and cannot be physically made by mixing anything else together. When two of these strong parent shades hold hands and blend together, they create a brand new child. This simple, relatable family tree analogy helps young, developing minds logically understand that new shades do not just magically appear out of thin air; they are created through a very specific, physical, and highly predictable combination.
Read More – Color Activities for Kids
The Relationship of secondary primary colors
To fully grasp this artistic concept, children must first be deeply, undeniably confident with their red, yellow, and blue. You cannot build a strong, tall house without pouring a highly solid foundation first. The unique relationship between secondary primary colors is deeply intertwined and highly dependent.
The primary ones are the raw, essential ingredients, just like flour, sugar, and eggs in a birthday cake recipe. You simply cannot bake the cake without having the base ingredients ready. By teaching children that every single shade they see on a glowing television screen, in a colourful storybook, or blooming out in the back garden originally comes from just three simple pots of paint, you give them a massive sense of creative power. They suddenly realise they personally hold the secret recipe to paint the entire universe.
The Official secondary colours name List
Once they logically understand the basic rules of mixing, it is time to clearly reveal the exact results of their messy artistic experiments. Here is a clear, descriptive list detailing every secondary colours name to help your child accurately label their new creations:
- Orange: This highly vibrant, energetic shade bursts into life when you confidently mix bright red and sunny yellow together. It is a warm, happy shade that immediately grabs a child’s attention.
- Green: This calm, earthy shade magically appears when you blend bright yellow and deep blue. It is the dominant shade of the natural world and feels incredibly peaceful.
- Purple: This rich, dark, and highly royal shade is born from mixing bold red and deep blue together. It is often the hardest for young children to mix perfectly, making it feel like a very special achievement when they finally get it right.
Read More – Colour Identification Games for Preschoolers
Brilliant examples of secondary colours
Abstract concepts always need solid, real-world grounding to make true sense to a toddler. Providing clear, highly relatable examples of secondary colours helps permanently lock the new vocabulary into a child’s working memory.
For orange, you can point to a sweet, peeling tangerine, a bright, falling autumn leaf, or a crunchy, raw carrot on their dinner plate. For green, encourage them to look at the wet grass in the local park, a tiny hopping frog, or the massive canopy of leaves on a tall oak tree.
For purple, show them a bunch of juicy grapes, a blooming lavender flower in a pot, or a dark, shiny aubergine in the supermarket aisle. Connecting these fresh new words to physical, tangible objects they can touch, smell, and taste makes the academic lesson completely real.
Hands-On Mixing and the Heureka Curriculum
You simply cannot effectively teach young minds about secondary colors by just talking to them. Children desperately need to physically feel the messy process. This active, highly tactile discovery perfectly aligns with the core, foundational principles of the Heureka curriculum.
Instead of a teacher just passively pointing at a flat, boring colour wheel poster on the classroom wall, the curriculum heavily demands that children get their hands completely dirty.
Give them two separate lumps of red and yellow playdough and gently ask them to squish and knead the pieces together until a bright orange ball magically appears in their palms. Let them carefully drop blue and yellow liquid food colouring into a clear glass of tap water and watch the green swirls beautifully dance around. When a child physically creates the end result entirely by themselves through active, messy play, the scientific fact locks permanently and securely into their developing brain.
Conclusion
Understanding the structure of the colour wheel is about far more than just painting a pretty picture to proudly hang on the kitchen fridge. It is a highly fundamental, practical lesson in direct cause and effect. When young, eager learners discover that combining two entirely different elements successfully creates something totally new and beautifully different, they are actively taking their very first, crucial steps into logical reasoning and early scientific observation.
It is deeply thought-provoking to realise that a small toddler mixing messy finger paints on a piece of cardboard is actively practicing the exact same predictive logic that a highly trained chemist uses in a professional laboratory. By heavily encouraging this messy, vibrant exploration, we actively teach them that the physical world is entirely malleable and eagerly waiting to be discovered.
To uncover more highly creative learning strategies and to discover wonderful new ways to support your child’s natural, wild curiosity, read the latest expert insights on the EuroKids Blog and secure their vibrant educational future through EuroKids Preschool Admission today.
FAQs
At what age should I start teaching my child about mixing paints?
Children as young as two or three years old can happily begin experimenting with basic paint mixing, even if they do not fully remember the formal names of the shades they are creating right away.
Why does my child’s purple paint always turn out looking muddy brown?
This is a highly common issue! It usually happens when a child uses too much dark blue paint or mixes in a tiny bit of yellow by accident. Try giving them a larger amount of red and only a tiny drop of blue to get a much better, richer result.
Is it better to use paints or crayons to teach this specific lesson?
Wet paints, liquid food colouring, or soft playdough are significantly better tools than hard wax crayons because they physically blend together much easier, allowing the child to actually watch the magical transformation happen in real time.