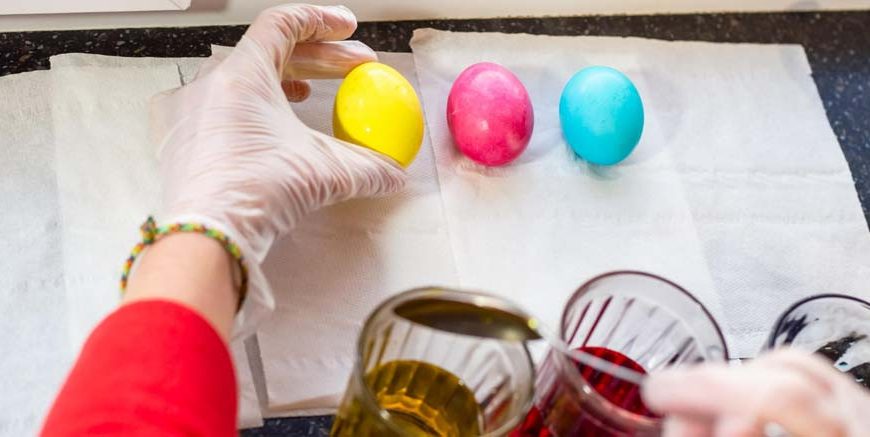
Imagine your kitchen table covered in layers of old newspaper, small cups of brightly coloured water lined up like a vibrant rainbow, and the sharp, tangy smell of vinegar floating in the air. For countless families, this is the deeply familiar scene of a beloved spring craft. But beneath all the messy splashing and the pretty colours lies a fascinating world of invisible reactions.
When we dip a plain white egg into a cup of dye, we are not just doing a bit of holiday art; we are actually conducting a brilliant, real-time science experiment! Let us peek into the bubbling world of chemistry that makes this joyful, colourful activity possible for our little ones.
How Do You Dye Easter Eggs?
If a highly curious child looks up from the table and asks, “how do you dye easter eggs?”, you might initially just tell them to carefully drop the boiled egg into the coloured water, wait a few minutes, and fish it back out. But to a young, budding scientist, the real puzzle is figuring out why the colour actually sticks to the surface.
To understand this, we have to look closely at the egg itself. An eggshell might look completely smooth and solid to the naked eye, but if you were to examine it through a powerful microscope, it is actually covered in thousands of tiny, invisible holes called pores.
Furthermore, the shell is made mostly of a tough, chalky substance called calcium carbonate. Fascinatingly, this is the exact same material that makes up the beautiful seashells you find washed up on the beach!
Read More – Preschool Science Experiments at Home for Kids
The Magic Ingredient in Your Egg Dye Kit
Whenever you pop to the local shops and pick up a standard egg dye kit, you will notice it usually comes with a few small, dry tablets of highly concentrated colour. But if you read the instructions printed on the back of the box, there is almost always one crucial, smelly ingredient you must add from your own kitchen cupboard: white vinegar. Have you ever wondered why we cannot just use plain tap water to mix the colours?
The secret lies entirely in chemistry. Vinegar is a type of mild acid. When this specific acid meets the calcium carbonate of the eggshell, a spectacular chemical reaction instantly kicks off. If you watch the cup very closely, you might even see tiny little bubbles forming on the shell while it sits in the liquid. Those tiny bubbles are carbon dioxide gas escaping as the acid works its magic!
The Science of Colour: Using an Easter Egg Dye Kit
This bubbly, acidic reaction is exactly what makes the colour from your easter egg dye kit bond to the shell so beautifully. The vinegar essentially ‘etches’ the egg. This means it slightly dissolves the very top layer of the shell, roughening up the smooth surface just a tiny bit.
More importantly, the acid changes the proteins floating on the outside of the shell. Think of the food colouring as thousands of tiny, floating magnets. The proteins on the eggshell are also like magnets, but normally, they are turned the wrong way around, so they accidentally push the colour away. The vinegar comes in and magically flips the egg’s magnets.
Suddenly, they attract the dye, locking the bright pinks, vibrant blues, and sunny yellows permanently onto the shell, much like how Velcro sticks together. Without the vinegar, the dye would simply slide straight off the slippery shell, leaving you with a very pale, disappointing pastel shade.
Read More – National Science Day Activities & Experiments for Kids
Experimenting with How to Dye Easter Eggs
Knowing this fun bit of chemistry completely changes how to dye easter eggs at home, turning the whole afternoon into a playground for scientific experimentation. You can actively encourage your little ones to test the science themselves.
Try setting up an experiment: put one egg in a cup with only dye and water, and place another in a cup with dye, water, and vinegar. Set a timer for five minutes. When you pull them out, the massive difference in the brightness of the colour is the pure chemistry at work!
You can also ask them what might happen if they were to leave the egg soaking in a cup of pure vinegar for a whole week. Because vinegar is an acid, it would eventually dissolve the entire hard shell completely, leaving behind a highly unusual, bouncy, rubbery egg!
Summary
When we thoughtfully blend everyday creativity with scientific curiosity, standard household activities beautifully transform into profound learning moments. The incredibly simple act of decorating for a spring holiday reveals the invisible, continuous dance of molecules and chemical reactions that silently govern our physical world.
By taking the time to explain the ‘why’ behind the brightly coloured shells, we actively teach our children to question, observe, and marvel at the hidden mechanics of their natural environment. Science is not just confined to sterile laboratories; it is bubbling right there on your kitchen table, waiting to be discovered.
To uncover more wonderful ways to spark your child’s curiosity and explore a world of joyful, holistic learning, dive into the EuroKids Blog and secure their brilliant future through EuroKids Preschool Admission.
FAQs
Why do we need to use vinegar when dyeing eggs?
Vinegar is an acid that reacts with the eggshell, allowing the food colouring to chemically bond to the surface, resulting in much brighter and deeper colours.
What is an eggshell actually made of?
The hard outer shell is predominantly made of calcium carbonate, which is the exact same strong material found in ocean seashells and pearls.
Can you dye eggs without using any vinegar?
Yes, you can, but the colours will appear very faint and easily wash off, because the dye molecules cannot properly grab onto the smooth, neutral surface of the shell.