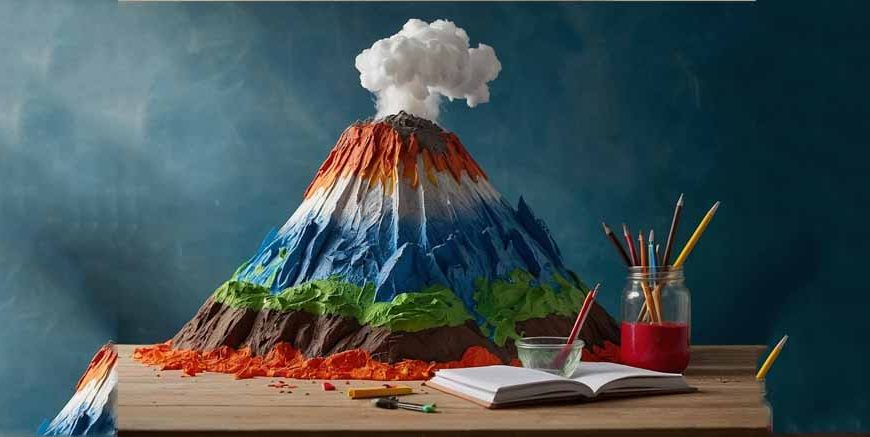
Messy kitchen tables, the sharp smell of vinegar, and the absolute thrill of watching bright red foam spill over the top of a homemade mountain. Building an erupting model is a childhood rite of passage. It brilliantly blends art, basic chemistry, and messy play into one unforgettable afternoon.
When children get the opportunity to build something with their own hands and then bring it to life through a chemical reaction, the learning sticks far better than any classroom lecture. If you are preparing for a school fair or simply looking for a fantastic weekend activity, you are in the right place. Let us roll up our sleeves, raid the kitchen cupboards, and discover exactly how to create a bubbling masterpiece.
Essential Volcano Information for Project
Before getting our hands covered in glue and paint, it helps to understand what we are actually trying to build. Providing solid volcano information for project presentations is just as important as the eruption itself.
What makes a real mountain blow its top? Deep beneath the Earth’s rocky crust, the temperature is incredibly hot. It is so hot that solid rock melts into a thick, glowing liquid known as magma. When gases and intense pressure build up underground, this magma is forcefully pushed upwards through deep cracks. Once it blasts out of the top crater and hits the cool outside air, its name changes from magma to lava. A good volcano project perfectly mimics this sudden, aggressive release of pressure, albeit much more safely and on a much smaller scale!
Read More – National Science Day Activities & Experiments for Kids
Gathering Supplies for Your Volcano Science Project
To create a spectacular, sturdy volcano science project, you do not need to buy expensive kits. You just need to gather a few common household items.
For the mountain, you will need:
- A small, empty plastic bottle (a 500ml water bottle is ideal).
- A sturdy piece of thick cardboard to act as the base.
- Plenty of old newspapers and masking tape.
- Flour and warm water (to create a sticky paper mache paste).
- Poster paints (think deep browns, earthy greens, and fiery reds).
For the lava, you will need:
- Baking soda (bicarbonate of soda).
- Standard white vinegar.
- Red food colouring.
- A squirt of washing-up liquid.
Step One: Building the Mountain
Start by placing your thick cardboard base on a flat surface. Stick your empty plastic bottle right in the centre of the cardboard using a generous amount of masking tape. Ensure the bottle’s lid is completely removed and thrown away—this open top is going to become your main crater.
Next, scrunch up sheets of old newspaper into balls and tape them tightly around the base of the bottle. You want to form a wide, sloping mountain shape, building it up to the neck of the bottle.
Once you are happy with the shape, it is time for the messy part. Mix your flour and water until it looks like thick pancake batter. Dip strips of newspaper into this sticky paste and lay them smoothly over your scrunched-up paper structure. Add three or four overlapping layers to make a hard, solid shell. Leave your mountain in a warm, dry spot overnight. Once it is completely dry and feels like a hard shell, get your paintbrushes out! Add green paint around the bottom to represent forests, and dark brown near the top where the rocks are bare.
Step Two: How To Make A Volcano Project Erupt
This is the moment everyone has been eagerly waiting for. Figuring out how to make a volcano project erupt is an exciting lesson in cause and effect.
Place your beautifully painted model outside on the grass or inside a large, deep baking tray, because things are about to get delightfully messy.
- Carefully pour two large tablespoons of baking soda directly down into the empty bottle crater.
- Add a generous squirt of washing-up liquid. This is the secret ingredient that traps the gas and makes your lava thick and super bubbly.
- Squeeze in five or six drops of bright red food colouring to give the lava its classic, fiery glow.
- Finally, pour in about half a cup of white vinegar, take a quick step back, and watch the magic happen!
Read More – Easy Preschool Science Experiments at Home for Kids
The Magic Behind the Volcano Eruption Science Project
The bubbling red foam that aggressively rushes down the sides of your painted model is not just a party trick; it is a brilliant display of chemistry. The volcano eruption science project works specifically because you are mixing a strong base (the baking soda) with an acid (the white vinegar).
When these two specific ingredients meet inside the dark bottle, they instantly fight and react to create a brand-new substance: a gas called carbon dioxide. Because gas naturally expands very quickly and needs lots of space, it violently rushes up and out of the narrow bottle neck, carrying the soapy red liquid right along with it. It is the perfect visual demonstration of how trapped gases and immense underground pressure cause real earthly eruptions.
Taking the Experiment Further
Once you have mastered the initial blast, true scientists know that the experiment is only just beginning. Encourage your child to play around with the variables. What happens if you add more washing-up liquid? Does the lava become thicker? What occurs if you use blue or yellow food colouring instead? Asking these questions encourages critical thinking and transforms a simple craft session into a proper scientific investigation.
Conclusion
Building an erupting mountain on the kitchen table is far more than just a fun arts and crafts activity to pass a rainy afternoon. It is often a child’s very first introduction to the thrilling, hands-on world of chemical reactions and earth sciences. By transforming everyday, mundane household items into a bubbling, fizzing spectacle, we actively show children that science is not locked away in stuffy, boring textbooks. It is a vibrant, exciting, and wonderfully messy part of our everyday lives. Encourage them to ask why things happen, let them measure out the ingredients themselves, and watch their confidence soar with every single colourful eruption.
To uncover more parenting tips, creative activities, and to explore a world of joyful early education, visit the EuroKids Blog and find out everything you need to know about joining our family through EuroKids Preschool Admission.
FAQs
Can I use baking powder instead of baking soda for the eruption?
No, you really need to use baking soda (bicarbonate of soda). Baking powder has different added ingredients and will not create the massive, instantly bubbly reaction you want when mixed with vinegar.
Is the homemade red lava safe for children to touch?
Yes, it is entirely safe! The lava is just a mixture of vinegar, baking soda, soap, and food colouring. It is non-toxic, though it might temporarily stain their fingers pink due to the food colouring!
What is the easiest way to clean up the messy eruption?
This is exactly why we highly recommend doing the final eruption step outdoors on the grass or inside a deep baking tray. If you use a tray, simply carry it straight to the kitchen sink and rinse everything down with warm tap water.