Yesterday this happened during homework time. I think it was after snacks, because her plate was still on the table and I had already told myself twice that I’ll clear it in two minutes.
The notebook was open, but the table was not ready for study. Pencil shavings were near the edge and one crayon had gone under the chair. Her school bag was open on the floor.
Then she had to practise a few letters.
Simple only, I thought.
She wrote a small “b” that looked like “d”, then made “a” from the bottom, then stopped.
“Amma, why does this letter go to this side?”
Fair question, honestly.
Maybe I was also tired, that is the honest thing. I had one eye on the kitchen, one eye on the clock, and only half my patience left. So when she got stuck on one letter, I first thought, why is this taking so long? Then I saw her face and felt a little bad.
When I realised writing was the real problem
At first, I thought she was just tired. But she knew the letters. She could recognise them, say them aloud, and point to them in her book.
Writing them was the problem.
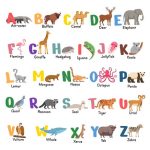
English alphabet writing looks easy to us because we have done it forever. For kids, it means remembering shape, direction, starting point, height, and pencil grip all together.
Before starting again, I stopped correcting everything. The more I corrected, the slower she became. She was not learning the formation of letters. She was waiting for mistakes.
So I took a rough page and said, “Let’s just try. No need to make it neat.”
Step 1: We made the letter in the air first
Before writing, I asked her to draw the letter in the air.
A big “C”. Then “O”. Then “L”.
She laughed because I was making it too big, like exercise. But it worked. Her hand understood the movement before the pencil came in.
This is one easy way to teach letter writing. No notebook. No eraser. Just the hand moving.
Step 2: Then she traced it with her finger
She did it once, then got distracted because the TV sound came from the other room. We traced again.
Finger tracing helped her feel the movement slowly, especially for “a”, “g”, “b”, “d” and “p”.
Letter writing for kids is also about the hand learning the route.
Step 3: I showed her where to begin
I put one small dot where the letter should start.
She said, “Oh, this is the starting place?”
That tiny dot did more work than my explanation. The starting point matters. If the beginning goes wrong, the letter slowly becomes something else.
Step 4: I used smaller words
“Start here.”
“Go around.”
“Come down.”
“Small tail.”
That’s it.
Kids need small words while writing. For English alphabet writing, these small direction words worked better.
Step 5: We practised one letter at a time
I used to make her practise many letters in one sitting. By the end, everything became tired writing.
That day, we did only three letters properly.
Only three.
Just enough for her to understand the movement.
When we teach letter writing, we sometimes want the full page to look complete. But a child may need only two or three good attempts.
Step 6: I let some imperfect letters stay
One “e” looked like it had given up midway. One “s” looked like a tiny sleeping snake.
But I did not erase everything.
I circled one better letter and said, “This one is nice. See how it started from the right place?”
Her face relaxed a little. Children need correction, yes. But if every letter gets erased, the page starts belonging to the parent.
Step 7: We used notebook lines slowly
The lines are useful. Some letters sit in the middle, some go up, some go down.
But too much line talk confuses them.
So I showed only one thing first.
“This letter sits here.”
Later we looked at tall letters and letters that go down.
For English alphabet writing, lines help with space. But first shape. Then the line.
Step 8: We found letters around the house
After some time, the pencil broke. Of course.
So while sharpening it, I asked her to spot letters around the room. The “B” on a book cover. The “M” on a snack packet. The “S” on her school label.
This made letter writing for kids feel less like copying from a page.
She liked the snack packet one the most. Naturally.
I also asked her to draw one letter with her finger on the table. There was enough eraser dust, so it worked.
Step 9: We stopped before she got irritated
We stopped while she still had a little energy left.
Usually I push for “just one more line” and that becomes five more minutes of complaining.
This time I closed the notebook.
She looked surprised.
“Finished?”
“Yes. Enough for today.”
Funny thing, she wanted to do one more “a” after that. Sometimes stopping early makes them want to continue.
When we think about how to teach letter writing, we think only about practice. But stopping at the right time matters too.
Read More – Fun Ways to Teach the Alphabet to Kids
That Small Moment When It Clicked
After we finished, she wrote one small “b” again on the side of the page.
This time it looked like “b”.
Not perfect. Slightly leaning. But very much “b”.
A child may know the alphabet and still struggle to write it. Recognition comes first. Writing comes slowly.
She looked at the “b” for half a second and then immediately asked where her clay box was. The notebook stayed open. The pencil was still on the table. The crayon was still under the chair because I forgot.
Later, while cleaning up, I remembered something a friend had once mentioned after a EuroKids Preschool interaction, that young children learn better when the movement makes sense, not only through repeat writing. It’s one of the reasons parents exploring Eurokids Preschool Admission often look for learning environments that combine hands-on activities with early literacy development.
I think I understood that properly only yesterday, with one messy table, one broken pencil, and one small letter that finally turned the right way.