Parents are always looking out for ways to enhance their child’s development, from enrolling them in drawing classes to encouraging them to participate in extracurricular activities at their preschool. We understand that parents do this to ensure that their little one succeeds in life and feels more confident in their abilities. However, enrolling your child in extracurricular activities alone isn’t enough to build that confidence. The real magic happens when parents actively support their kids’ learning journey at home. If your little artist is attending drawing classes but still struggles with basic lines, you are in the right place. In this blog, we will share some effective ways to teach kids how to draw standing, slanting, and sleeping lines.
What is a Standing Line?
- How to Teach a Preschooler to Draw Standing Lines?
- Is Learning Standing Lines Important?
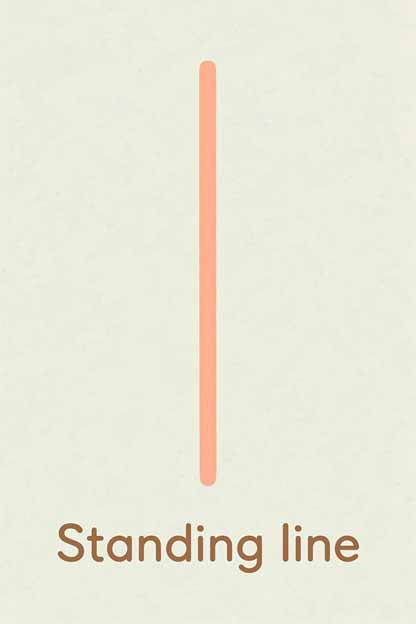
A standing line is simply a vertical line, just like a tall tree. You can draw a standing line by moving the pencil in a straight up-and-down motion. Your children learn to draw a standing line first thing in their drawing class. That’s because standing lines are one of the basic strokes used in writing letters like I, T, and H, and numbers like 1 and 9.
The best way to teach your kids to draw standing lines is to ask them to place their pencil at the top of a blank notebook and pull the pencil straight down. It might seem nonsensical at first, but it’s a fun way to teach your kid to draw standing lines and improve their hand control.
Yes, learning how to draw standing lines is important. Interestingly, it’s first step in learning how to write.
What is a Sleeping Line?
- How to Teach a Preschooler to Draw Sleeping Lines?
- Are Sleeping Lines Important?
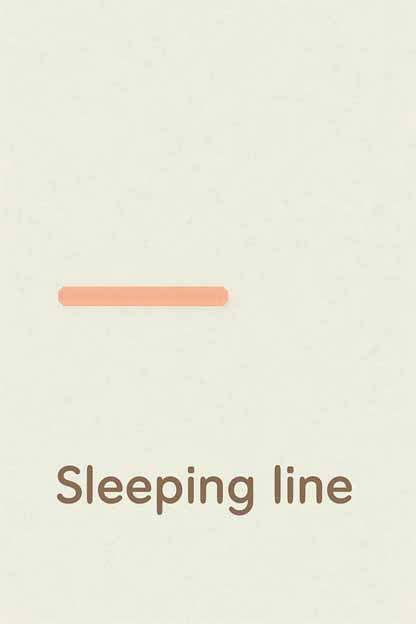
A sleeping line is a simple horizontal line that resembles a person taking a nap. You can use your pencil to draw a straight line from left to right. A sleeping line, like a standing line, is important as it is used in many letters, such as E, F, and H, and numbers like 4. Children who can draw a straight line well can be proficient in writing the English alphabet and numbers.
Also Read: A to Z Alphabet Worksheet for Kids
Ask your child to draw a straight line across a blank notebook from left to right to create a sleeping line. Additionally, you can use sleeping line worksheets for nursery children, which include activities or exercises that introduce your little one to the sleeping line and help them better understand its versatility. You can find these worksheets online.
Yes, sleeping lines are important. They are used in letters like H and E. Therefore, it’s important for kids to learn how to draw sleeping lines.
What is a Slanting Line?
- How to Teach Preschoolers to Draw Slanting Lines?
- Are Slanting Lines Important for Nursery Kids?
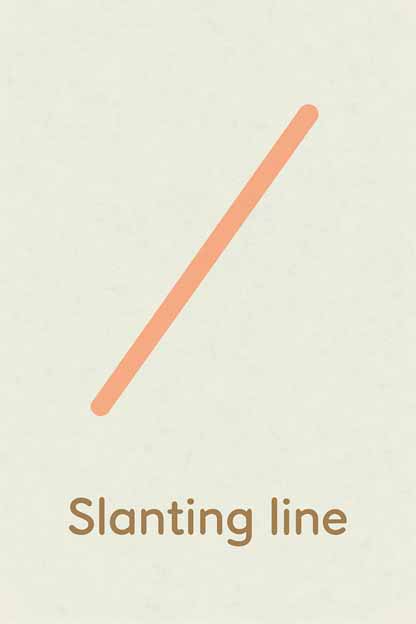
Thus far, we have seen sleeping lines and standing lines. What is a slanting line?
When we talk about a slanting line, we mean a line drawn at an ‘angle’. Like, a diagonal line. It is perfectly in between a sleeping line and a standing line. Slanting lines are frequently used in drawing mountains and patterns, which is something that kids in preschool often draw.
Ask your little one to move the pencil in a slanted direction, up, down, right, or left.
Yes, introducing your kids to slanting lines will not only enhance your kids’ linguistic skills, but it will also help them draw sunrises and sunsets much more easily than their peers.
What is a Curved Line?
- How to Teach Preschoolers to Draw Curvy Lines?
- Why Are Curvy Lines Important for Kindergarten Kids?
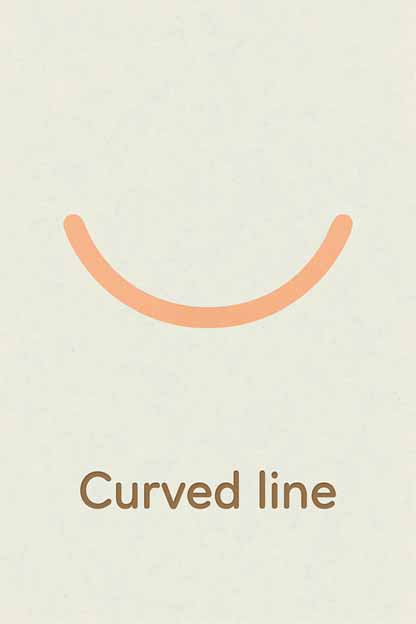
A line that goes ‘Bumpety Bump’, is sure to catch the attention of your little one! Perhaps the best way to explain a curved line to your child, is to tell them it looks like the line of each colour in a rainbow. Starting at one point on paper, and gently curving the pencil as it glides along the sheet. One of the best characteristics of curved lines is that they can go in the direction you want them to. Up or down, left or right, take your pick!
Also Read: Fun Shapes Activities for Kindergarten
Ask your child to move their pencil in smooth, rounded shapes like waves or circles to make curvy lines.
Letters like C, S, and O are made with curved lines. Therefore, introducing curvy lines activities to kids will help them practice smooth hand movements and learn the rhythm of writing.
How Can Parents Teach Their Kids to Draw Standing, Curved, Slanting, and Sleeping Lines?
The one thing everyone can do to master any art is practice. For little children, drawing sleeping and slanting lines is an art that must be learned well, before they are able to perfect it. In this section, you will find fun ways to teach your children to draw these lines.
- Old School Drawing
- Making Letters with Straw
- A combination of a standing and sleeping line.
- A combination of standing and slanting lines.
- Worksheets
- Stencil Fun
- Drawing Lines from One Object to the Other
All children love to draw! Help bring out the budding artist in your little one with this cool Activity that is sure to get them to master those lines in no time!
To do: Hand them some crayons and a piece of paper. Tell them to make drawings of things that will require good use of those lines. For instance, drawings of Houses, Cupboards, etc.
Why use straws only for taking sips of our favourite drinks? They can help us make Letters, too!
To do: Hand your child some straws and tell them to make letters with them. Letters are combinations of different types of lines, as shown in the following examples:
Sometimes a little more ‘formal’ practice might just do the trick, succinctly well!
To do: Get some worksheets for your children, that will help them master the art of drawing lines. This is essentially accomplished by their ‘joining the dots’ on the sheets, which in itself is a fun exercise for kids.
Using a stencil is a lot of fun for little children. The bonus: They will learn to master those lines!
To do: There are all sorts of things that children can master through the use of a stencil. Things like shapes, alphabets and even lines!
Children never fail to ‘find the connection’, when they ‘connect things.’
To do: Get your children to draw a couple of things on a piece of paper, using a pencil. For instance, you could have them draw a goal post and a football. Then, have them connect the two with a straight line!
How To Teach Kids the Alphabet with Sleeping, Standing, and Slanting Lines
Introducing young children to the alphabet becomes much easier when we break letters down into simple shapes they already recognise. This helps children understand the structure of each letter and improves their handwriting skills as they begin to form letters independently.
Here’s how you can teach the alphabet using a standing line, a slanting line and a sleeping line:
- Combination of 1 Standing and 1 Sleeping Line
- Combination of More Standing and Sleeping Lines
- Combination of Slant Lines
- Combination of Sleeping and Slant Lines
- Combination of Standing and Slanting Lines
- Combination of Standing/Slant Lines with Small Curves
- Combination of Big Curves and Lines
- Big Curves
Examples: L and T
These letters are perfect for beginners. L uses a tall standing line and a short sleeping line. T is similar, just with the sleeping line at the top.
Examples: H, I, E, F
These are great for practice. Children will learn to combine multiple lines in various positions.
Examples: X, V, W
These letters teach symmetry and crossing. Use visual aids to show how slants lean like a slide.
Examples: A and Z
Letters like A introduce balance, while Z adds fun with zig-zag shapes.
Examples: K, M, N, Y
These letters are slightly more advanced but fun. Let children experiment with which line comes first.
Examples: B, J, P, R, S, U
Here, you can introduce the idea of curves, helping kids gradually understand more complex shapes.
Examples: D, G, Q
These letters demonstrate how straight lines and curves can be combined in a single letter.
Examples: O and C
Perfect for circle practice, these are easy and enjoyable for beginners to trace.
Parents can also create a line family chart with their child, where each letter is grouped under its corresponding line type. You can even use colourful sticks or clay to form the letters, making it a more hands-on experience. This method helps kids visually recognise patterns, builds their fine motor skills, and gives them the confidence to write all on their own!
Also Read: Fun Ways to Teach the Alphabet
Final Thoughts
Teaching your child to draw lines might seem like a small step, but it’s actually laying the groundwork for so much more. Every time they engage in standing line, sleeping line activities, they are building the confidence and skills they will carry with them long after their kindergarten. So, grab those pencils and crayons and enjoy watching your little artist grow, one line at a time. You can also read our blog, How to Teach Lines To Preschoolers, to understand the importance of teaching lines to young kids. Don’t forget to visit EuroKids Blogs for such fun and interesting insights about young kids. Also, check out EuroKids Preschools for the right first step in your child’s learning journey.
Related Blogs:
- Effective Teaching for Slow Learners: Slow learners thrive with patient guidance, visual tools, and consistent encouragement. Adapting teaching methods to match their pace helps build confidence and enables them to grasp concepts more effectively. This blog serves as a guiding light for parents and preschool teachers seeking innovative ways to teach students who are slow learners.
- Important Social Skills for Kids: Social skills, such as sharing, listening, and cooperating, play a key role in a child’s emotional development. This blog helps you understand how to teach kids these skills through play, role-modelling, and conversations.
- Ways to Teach Responsibility to Students: Teaching responsibility begins by assigning age-appropriate tasks to students and allowing them to see the consequences of their actions. Through regular routines and positive reinforcement, kids learn accountability and independence.