Prepare to be captivated as we start on a fascinating journey into the realm of sparkling slime! Crafting your very own glittery masterpiece exceeds the ordinary – it’s a magical experience that holds a special place in the hearts of children. In this extensive step-by-step guide, we invite you to dive into the complicated process of how to make glitter slime, promising a sensory adventure that goes beyond the ordinary. With every glittering step, this guide unfolds a world of sparkle and squishiness, destined to delight and ignite the imagination of every young creator. Join us on this dazzling journey, where creativity meets magic, and the joy of crafting becomes an unforgettable experience for children of all ages.
Ingredients You’ll Need:
- Clear Glue:
- Baking Soda:
- Contact Lens Solution:
- Glitter:
- Bowls and Spoons:
Lay the foundation for your slime masterpiece.
Essential for achieving the perfect slime texture.
Activates and binds the ingredients together.
Choose a spectrum of colors for a dazzling effect.
Essential tools for mixing and stirring the delightful mixture.
Step 1: The Glittery Canvas
Begin by pouring a generous amount of clear glue into a bowl, setting the stage for your sparkling slime adventure. Adjust the quantity based on your desired slime volume. The transparent nature of the glue acts as a canvas, allowing the glitter to shine through brilliantly.
Step 2: Infuse the Magic of Glitter
Now, it’s time to add the star of the show—glitter! Sprinkle your chosen glitter into the glue, unleashing a stream of sparkles. Mix the glitter ensuring an even distribution. This step is where you can let your creativity shine, choosing between a subtle shimmer or an extravagant burst of glittery magic.
Step 3: Activating the Transformation
Introduce a pinch of baking soda into the glitter-infused mixture. The baking soda is the secret ingredient responsible for the ideal slime texture. Stir it in, and feel the magical transformation unfolding as the mixture begins to take on the characteristics of slime.
Step 4: Unleash the Binding Power
Now, let’s bring the slime together. Gradually add contact lens solution while stirring the mixture. Witness the formation of the slime as it pulls away from the bowl’s edges. Continue stirring until you achieve the desired consistency—a perfect blend of stretchy and squishy goodness.
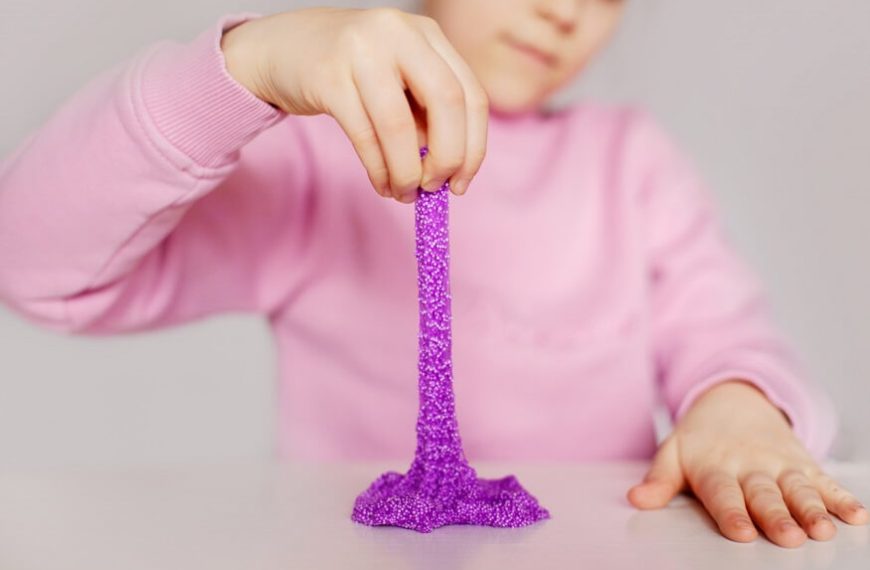
Step 5: Dive into Sensory Play
Once your sparkling slime has taken shape, take it out of the bowl and begin the mixing process on a flat surface. This step marks the commencement of the real fun! Feel the glittery goodness between your fingers as you stretch, twist, and squish your sparkling slime, immersing yourself in the sensory delight it provides.
Understanding the Science of Slime: A Deeper Dive
Slime, in its various forms, has become a beloved sensory play material for children. Understanding the science behind slime can enhance the crafting experience and provide valuable insights for young minds.
- Polymerization:
- Cross-Linking:
- Activators:
The glue in slime contains polymers, which are long chains of molecules. When an activator-like contact lens solution is added, it triggers a chemical reaction called polymerization, causing the molecules to link and create the stretchy consistency of slime.
Baking soda acts as a cross-linker in the slime-making process. It forms bridges between the polymer chains, creating a network that gives the slime its unique texture. The more cross-links, the thicker and stretcher the slime.
Various substances can act as activators in slime recipes. While contact lens solution is a popular choice, alternatives include saline solution and borax. Experimenting with different activators can showcase the versatility of slime-making.
Tips for a Glittery Extravaganza:
- Experiment with Glitter Sizes:
- Create a Custom Glitter Palette:
- Storage Solutions:
Try using different glitter sizes to achieve various sparkle effects. Larger glitter may create a bold, eye-catching look, while finer glitter can produce a subtle, magical shimmer.
Mix and match glitter colors to create a custom color scheme for a unique visual experience. Encourage children to explore color combinations and express their individual creativity.
Store your sparkling slime in airtight containers to preserve its freshness for future play. This ensures that the glittery magic can be enjoyed time and time again.
The Educational Value of Slime-Making: Learning Through Play
Beyond its entertaining qualities, slime-making offers a range of educational benefits for children:
- Scientific Exploration:
- Sensory Development:
- Creativity and Expression:
Engaging in slime-making introduces children to basic scientific concepts such as chemical reactions and polymerization. It provides a hands-on, tangible experience that complements classroom learning.
Kneading, stretching, and squishing slime supports sensory development in children. The tactile experience enhances fine motor skills and fosters an understanding of different textures.
Crafting their own slime allows children to express their creativity. From choosing glitter colors to experimenting with textures, slime-making is an artistic outlet that encourages imaginative thinking.
Celebrate the culmination of your creative endeavor as you gaze upon the sparkling masterpiece you’ve brought to life! Sparkling slime transcends the ordinary realms of a mere craft; it unfolds as a sensory adventure, a dazzling journey that not only sparks creativity but also captivates the ever-curious minds of the young. Whether the rain is tapping at your window or you’re adding a touch of glittery magic to a social gathering, this enchanting creation promises not just joy but a reservoir of endless delight for children of every age.
So gather your ingredients; each one has a tale that is just ready to be incorporated into the overall composition of your glitzy mixture. With a glimmer of excitement, set off on the enchanted adventures that await with glitter slime as you unleash the limitless possibilities of your creation and let your imagination run wild. It’s not simply a craft activity; it’s an invitation to a world where sparkle meets squishiness and every turn becomes a learning opportunity for kids and adults alike. The journey of slime for kids has just begun, and the possibilities are as limitless as the sparkle in your glitter slime – let the magic unfold!
At EuroKids, we believe in fostering not just education but also the joy of creative exploration. Our commitment to nurturing young minds extends beyond the classroom, and that’s why we’re thrilled to introduce the enchanting world of sparkling slime. Join us on a glittery adventure where learning meets play, and every squishy moment becomes a treasure of childhood memories.
EuroKids understands the significance of hands-on experiences in a child’s development. With our carefully curated activities, like crafting sparkling slime, we aim to ignite curiosity, promote sensory play, and unleash the boundless creativity within each child. Our experienced educators guide little hands through the magical process, turning a simple crafting session into an educational journey. As your child kneads, stretches, and sparkles with EuroKids, they’re not just making slime for kids; they’re creating memories, building thinking skills, and experiencing the joy of learning through play. Join us in crafting these magical moments because, at EuroKids, we believe that every glittery squish is a step towards a brighter, more imaginative future.